Installing the Alephino GUI applications (Windows Client)
Start Alephino50ClientSetup.exe.
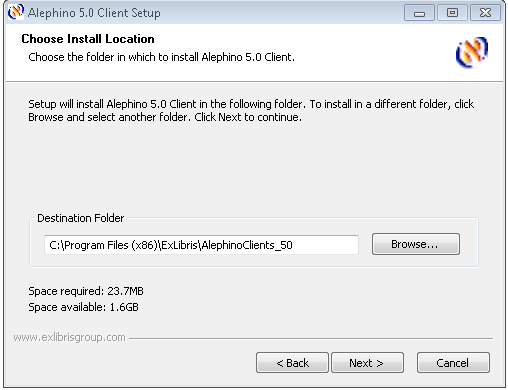
As usual, you have the possibility to select the installation directory.
(Defaults: C:\Program files\ExLibris\AlephinoClients_50)
Setup prevents from overwriting an existing Alephino Client installation, otherwise an error message like this appears:
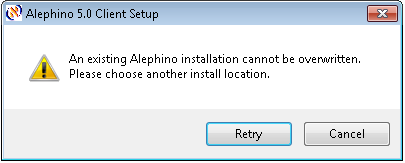
If you want to have an outdated Alephino Client removed, pls. use the uninstall utility available via Control panel / software.
In order to complete the installation further information is required:
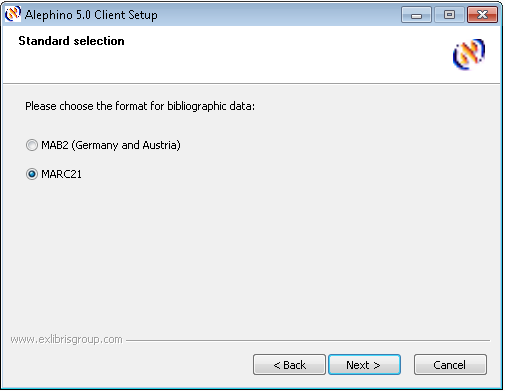
Next step is selection of the standard format for bibliographic data.
At the moment Alephino offers MAB2 (valid for Germany and Austria) and
MARC21. Pls. note that the Alephino server you want to address must
also support the same format.
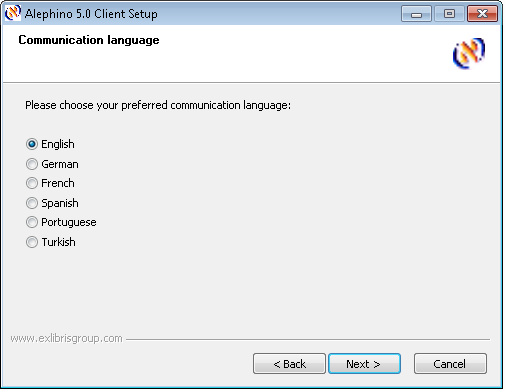
The preferred communication language is now to be choosen out of 6 languages that are currently available. Preferred in this combination means the language which is used on start of any Alephino GUI application.
For sending documents by e-mail the Alephino clients need to know the address
of the server in your local network that is used for sending mails.
The e-mails also use a fixed sender address which you please specify
in the second dialogue displayed below.
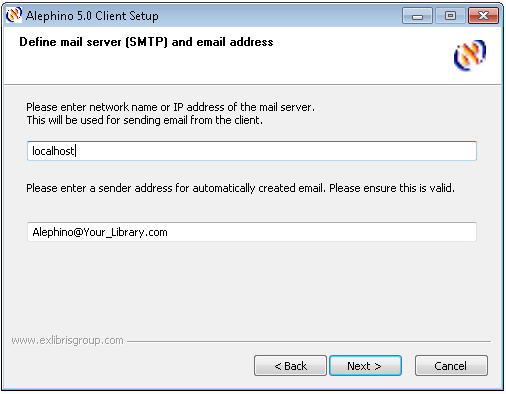
Pls. note that the mail server must be reachable from your local PC via
SMTP protocol (TCP port 25). Alephino GUI from version 4.1 and higher
does support authentication methods with the SMTP protocol. The
necessary adjustments for this can be entered with the cataloging
module.
Subsequently, just like when installing the Alephino server,
you are asked to enter the IP-address and port number of the server machine. If server and client
components should be locally installed and if you also want to use them only locally,
simply confirm the default localhost.
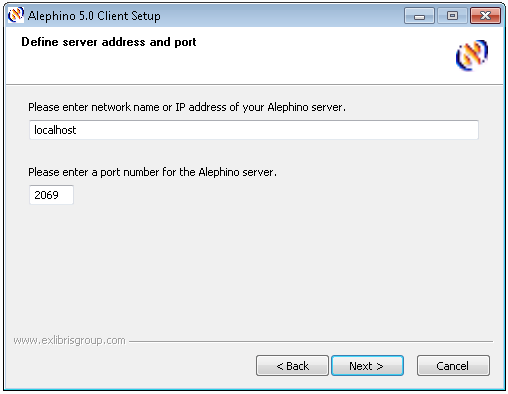
Please note that host address in the configuration of the Alephino
Windows clients must not be longer than 30 characters. If the name of
your Alephino server is longer than this, enter its IP address in
numerical notation instead.
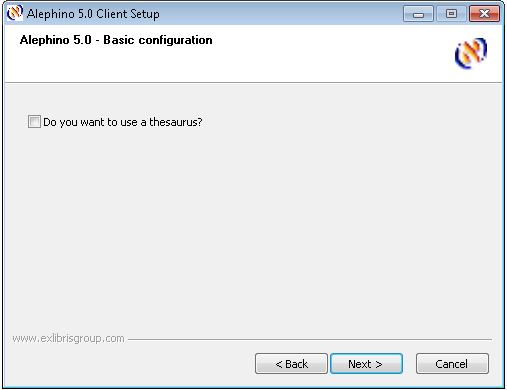
The Alephino database contains a variety of logical files which may not
be of interest for the majority of customers und which therefore should
not appear in the Connect menu for the benefit of clarity.
If required, these logical files can be added easily any time later on using the
Library manager.
Use the setup dialogue displayed below in order to hide or activate
the thesaurus and its facets.
Update-Installation
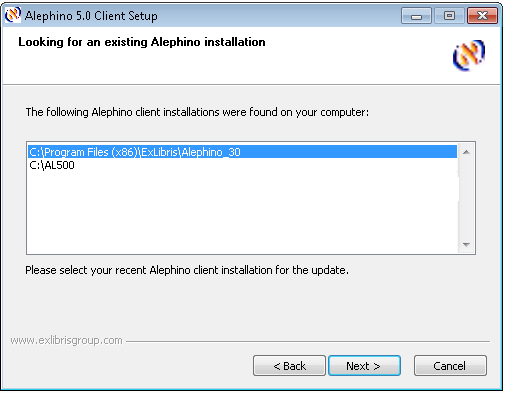
The next dialog offers the opportunity to select the installation type. When Update installation have been choosen, setup will continue with searching on the specified logical drive for existing Alephino GUI installations.
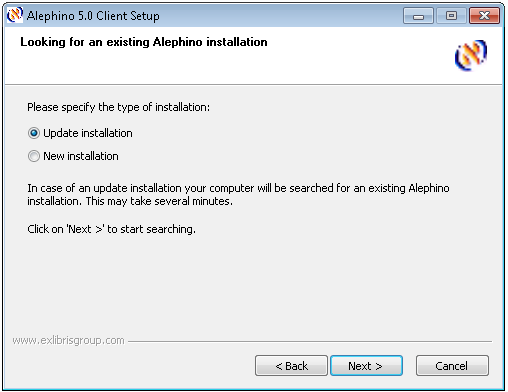
If Alephino GUI installations from version 3.0 and higher have been found, setup will present them
in a list from where you have to choose the valid one. Update means,
that in addition to the regular new GUI installation local templates
will be copied from existing Alephino 3.0 or 4.x GUI environment.
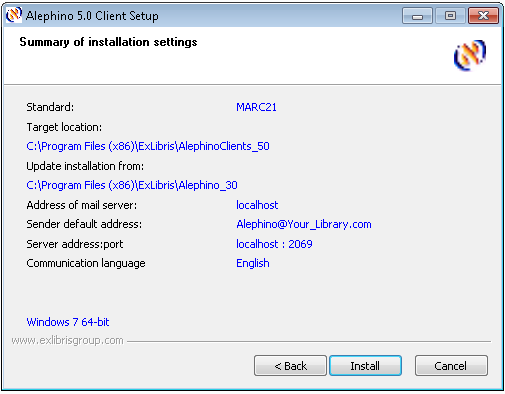
Summary of setup parameters
Before setup starts the copy action, a summary of all the parameters
you've entered will be presented. If you find everything correct, pls.
start the installation procedure by clicking the Install button.
Setting up permissions
Customers who use WindowsXP or Windows Vista should consider that
in order to avoid conflicts resulting from missing permissions the whole
installation directory and its subdirectories must grant "Full access" to all users
e.g. C:\Program files\ExLibris\AlephinoClients_50.
This is especially important if the Alephino workstation is used by different Windows user identifications!
Start up / first steps
Start the components of Alephino:
a) Services Windows version
 Desktop / Alephino Server
You'll get a console window with the following messages:
Alephino 5.0 Server as Console App
TT.MM.JJJJ HH:MM:SS Alephino Server
TT.MM.JJJJ HH:MM:SS WinSock 2.0
 Desktop / Z39.50 Gateway
You'll get a console window with the following messages:
Alephino 5.0 ZGate as Console App
TT.MM.JJJJ HH:MM:SS Alephino Z39.50 gateway
TT.MM.JJJJ HH:MM:SS WinSock 2.0
 Start / Programs / Apache Web
Server / Start Apache as console app
Start / Programs / Apache Web
Server / Start Apache as console app
You'll get a console window with the message: "Apache/1.3.34 (win32) running"
If you've choosen "Run as service for all users" - which is the default for APACHE
installation, the http-server will run as a Windows service (background process).
In order to activate the modified configuration which was created by the
Alephino setup procedure, you have to restart APACHE using
System configuration / maintenance / services.
b) Services Unix versions
- Change into subdirectory bin.
Setup has created 2 scripts here alephino.rc.debian and alephino.rc.suse.
Rename alephino.rc.debian to alephino.rc.
(Script with the ending .suse is only suitable for Linux servers derived
from S.u.S.E. distribution.)
Call up alephino.rc with the parameter start.
In case of success the following messages will appear:
Starting Alephino 5.0 Server
14.04.2014 11:58:43 Alephino server
Starting Alephino 5.0 Z39.50 Gateway
14.04.2014 11:58:44 Alephino Z39.50 gateway
Starting Alephino 5.0 Z39.50 Server
14.04.2014 11:58:45 Alephino Z39.50 server
Starting Alephino 5.0 SIP2 Server
14.04.2014 11:58:46 Alephino SIP2 self check server
The messages about services that have been started depends on the licenses you got.
In contrast to former Alephino releases lower than 3.0, Alephino 5.0 uses the technology of
so-called dynamically linked libraries. The Alephino server alephino
and also the service adm_batch
will not start without a valid link to those libraries. Therefore, they
should never be started simply via the shell but always by using our
scripts. If you got an error message like this:
error while loading shared libraries: libxalian-c.so.110
this is a hint that the link to the installation directory of the mentioned
library is missed. Usually you'll do it by setting the environment variable
LD_LIBRARY_PATH.
Alternatively you may add the Alephino installation path including its sublist bin to the dynamic linker search list which usually can be
found in /etc/ld.so.conf and perform ldconfig afterwards to make it effective.
- http-Server
To activate the modified configuration after integrating the entries from
vhost.alephino it is necessary to restart the http service.
Normally for this there is a Shell script apachectl which is located
in the subdirectory bin of your Apache server:
./apachectl restart
Alephino GUI applications
 Start / Programs / Alephino 5.0 Clients / Cataloging
Upon the first start of an Alephino client, a login mask is displayed.
Please enter "SYS" both as user and as password:
- <Start your Web browser>
You'll reach the Alephino Web services under the following addresses:
As for the GUI clients you need to be logged on to Alephino Web Services firstly. Alephino comes with the staff user account SYS (also password SYS) preconfigured. This user has all permissions (Administrator). Pls. note that the login form works case sensitive.
*) hostname stands for the IP-address (or the network name),
port for the port number of your Alephino server according to your
specifications made during Server setup.