vhost.alephino
# Ports for Alephino Services
Listen 8070
Listen 8040
# Alephino OPAC
<VirtualHost *:8070>
ScriptAlias /alipac "/work/alephino/bin/alipac"
ErrorLog "/work/alephino/temp/alipac_error.log"
TransferLog "/work/alephino/temp/alipac_access.log"
Alias /download "/work/alephino/temp"
Alias /pix "/work/alephino/htdoc"
</VirtualHost>
# Alephino Administration
<VirtualHost *:8040>
Alias /german "/work/alephino/htdoc/aliadm_eng"
Alias /english "/work/alephino/htdoc/aliadm_eng"
ScriptAlias /aliadm "/work/alephino/bin/aliadm"
ScriptAlias /aliadz "/work/alephino/bin/aliadz"
ErrorLog "/work/alephino/temp/aliadm_error.log"
TransferLog "/work/alephino/temp/aliadm_access.log"
# Authentication
#<Directory "/work/alephino/bin">
#AllowOverride AuthConfig
#AuthType Basic
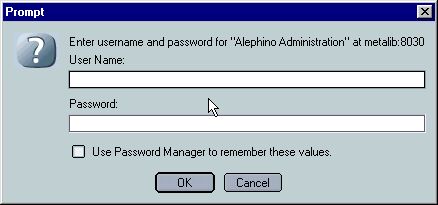
#AuthName "Alephino Administration"
#AuthUserFile /work/alephino/passwords
#Require user alephino
#</Directory>
</VirtualHost>
./htpasswd -c /work/alephino/passwords alephino(The path of the password file /work/alephino/passwords and also the user name alephino are only examples.)
./apachectl restart
(The appearance of the input form depends on the specific browser you use.)